By Allison Parrish. Part of Computational Approaches to Narrative.
Download Twine here. This tutorial is about Twine 2.2.1, and should hopefully be useful even for slightly earlier or later versions. (A few years ago I made a tutorial specific to Twine 1.4, which might still be useful if you want to use that version!)
A Twine game is made from “nodes” (or “passages”; in fancy hypertext terms, we’d call these “lexia”) and links between them. The application’s interface represents each node as a box, and links between nodes as arrows from one box to another. This is helpful for understanding and keeping track of the structure of your game.
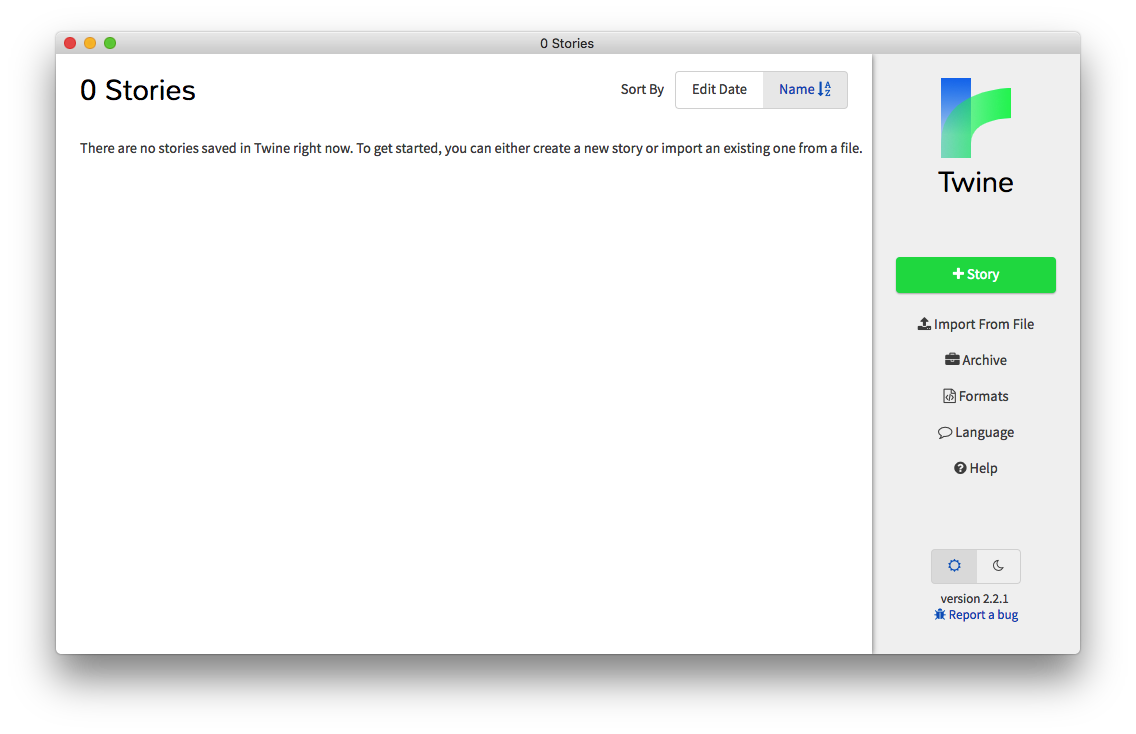
When you start Twine for the first time, it looks something like this:
This is a list view that shows all of the stories you’ve made. You haven’t made any stories yet, so there’s nothing listed.
At the most basic level, Twine is a way of making stories where different parts of the story’s text can be linked to each other. Doing that much is easy. But Twine also makes it possible to do a lot more than just write text with links: things like changing text formatting, adding media and animations, making things interactive, saving progress, etc. To make these things happen, you’ll have to write a little bit of code.
Because there are so many different Twine users with different ways of thinking and different styles, Twine supports a handful of different sets of rules about how to write this kind of code, so that everyone can write code in a style that’s comfortable for them. These sets of rules are called “story formats.” Each story you make has to use one (and only one) story format. The default story format is called Harlowe, but the one I like to teach with is SugarCube. So I’m going to have you use SugarCube for this tutorial. To do this, though, you’ll need to change the default story format from Harlowe to SugarCube.
There’s some text in the story list in the right-hand sidebar that reads “Formats,” which is a link that will open a dialog box when activated. In my version of Twine, the dialog box looks like this:
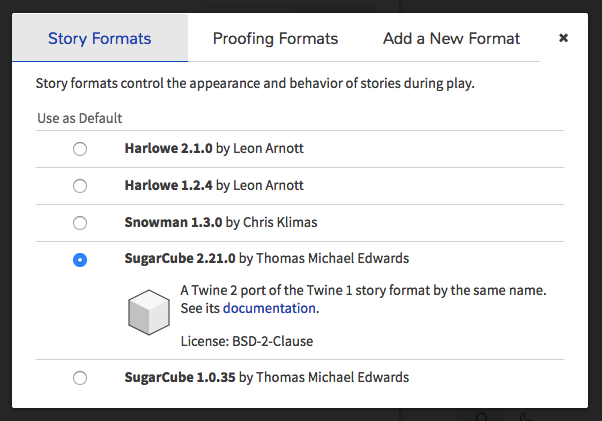
In this dialog box, select the SugarCube alternative with the latest version number (SugarCube 2.x.x, the higher the numbers the better). Then close the dialog box.
To make a new story, press the button labelled + Story.
You’ll get a dialog box that asks you to name your game. You may have no
idea what your game is yet, and that’s okay. Just type something in. You
can always change it later.
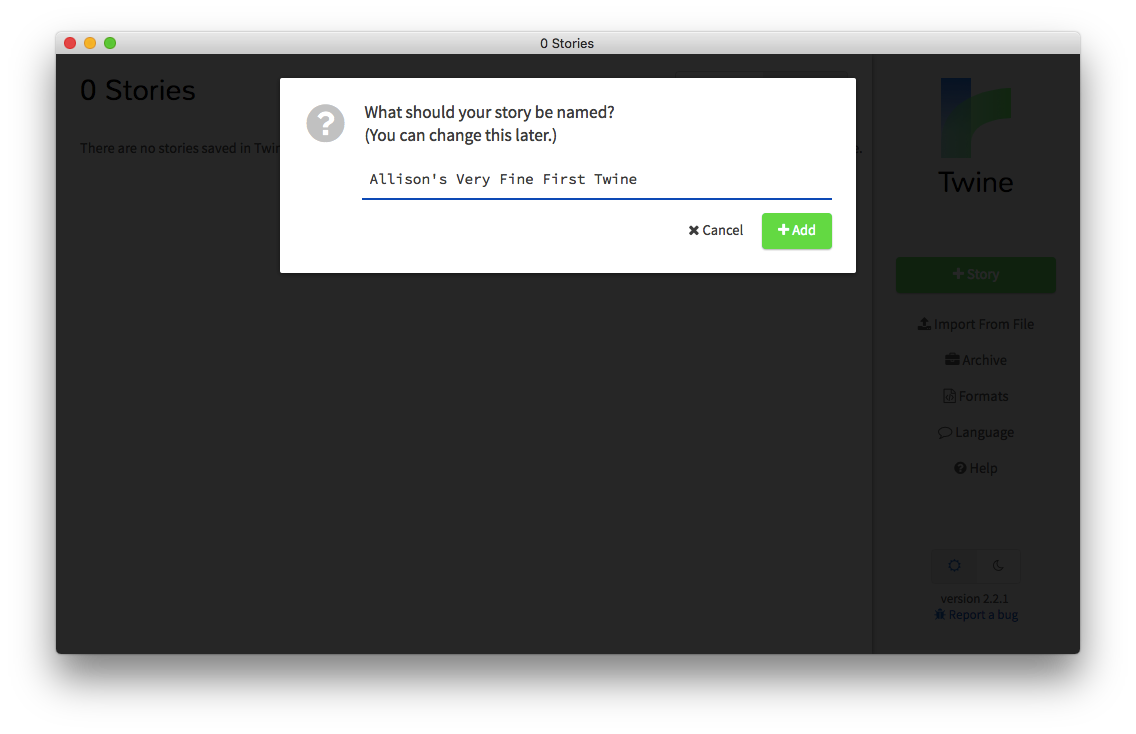
After you click + Add, you’ll see the following screen.
This is where you actually write your story. There’s a box labelled
“Untitled Passage” with a small green rocket icon next to it. This is
where your story will begin.
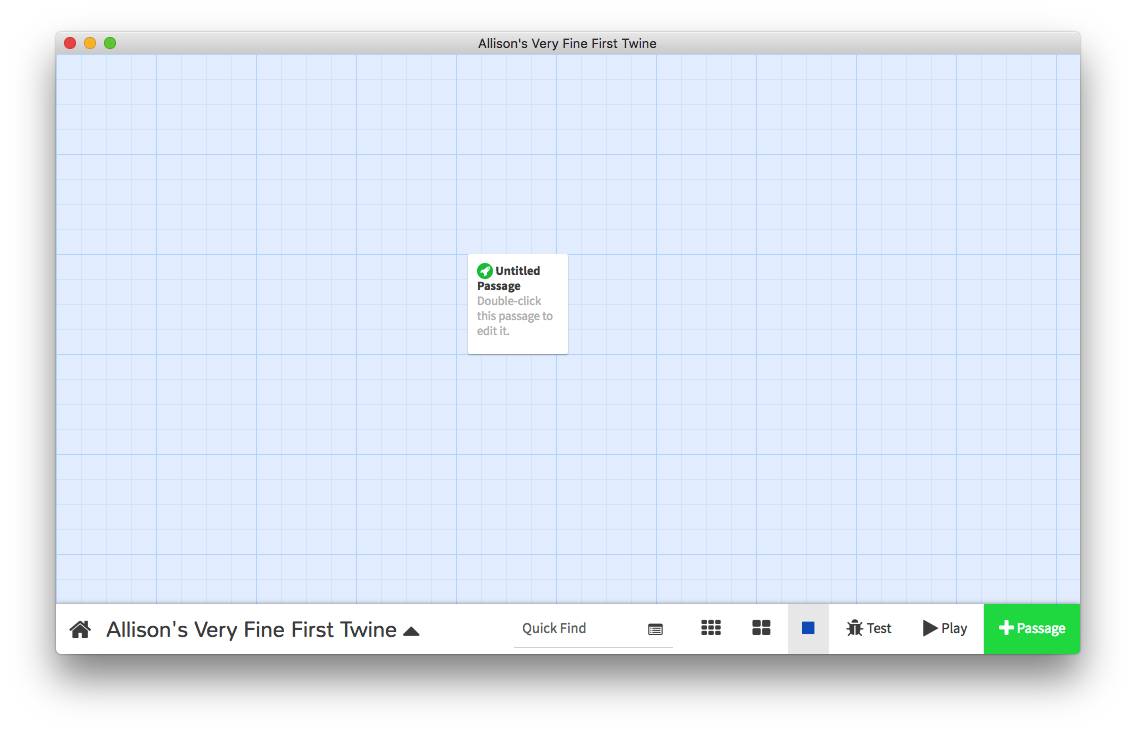
In the lower left-hand corner, there’s a “Home” icon, which you can use to return to your list of stories.
Eventually, this window will be full of little boxes, each of which represents a “passage.” A passage is a small bit of text that can contain links to other passages, and itself be the target of links. Typically, the main work of making a Twine story is writing passages and deciding which passages will be linked to each other, and how those links work.
To change the text of a passage, double click on it in the story view. You’ll see the Editing interface, which looks like this:
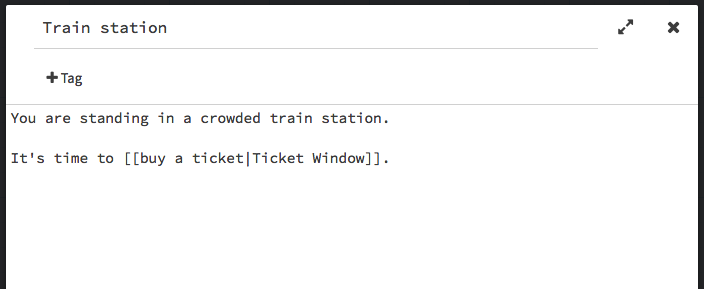
When I take a screenshot of the passage text editing dialog, I’ll include a transcript of the content of the window in the following format, so you can use a screen reader or easily copy/paste.
Passage name: Train station
Passage body:

    You are standing in a crowded train station.

    It's time to [[buy a ticket|Ticket Window]].
The weird text in the [[ and ]] is a
link. The text to the left of the pipe character
(|) is the text of the link, and the text to the right of
the pipe character is the name of the passage you want to link to.
When you close the passage text editing window (your changes will be saved automatically), you’ll notice that a new passage has appeared:
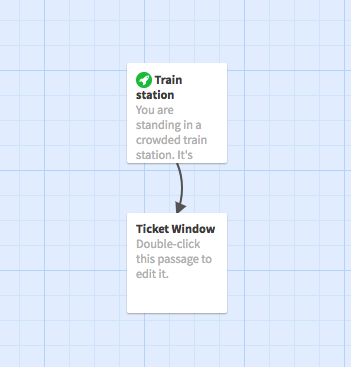
Yep, that’s right! When you create a link that targets a non-existent passage, Twine goes ahead and creates it for you. Handy. The story editing interface also visualizes links between passages with arrows, making it easy to keep track of how your passages are related.
I’m going to double click on the new passage that Twine created for me and add some new text:
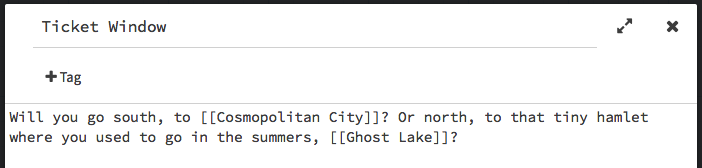
Passage name: Ticket Window
Passage body:

    Will you go south, to [[Cosmopolitan City]]? Or north, to that
    tiny hamlet where you used to go in the summers, [[Ghost Lake]]?
When you close this window, Twine will once again create the passages
that you’ve referenced. Note that if you don’t include a |
in your link, Twine will assume that the text of the link is also the
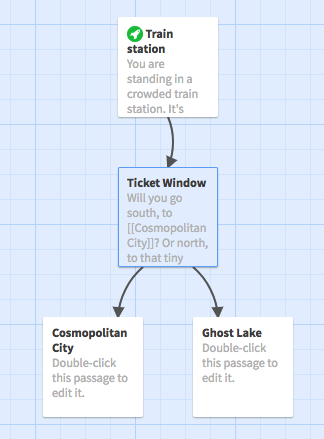
name of the passage that you want to link to. Now your story should look
like this:
Now go back and add some text to the new passages you created.
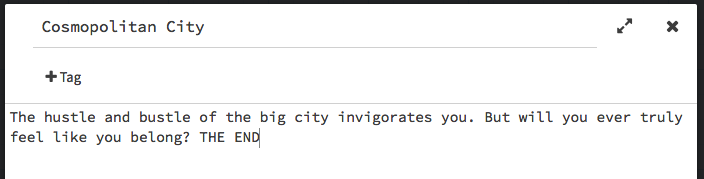
Passage name: Cosmopolitan City
Passage body:

    The hustle and bustle of the big city invigorates you.
    But will you ever truly feel like you belong? THE END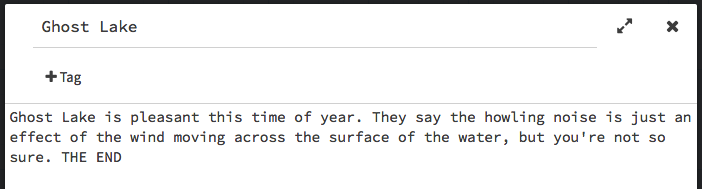
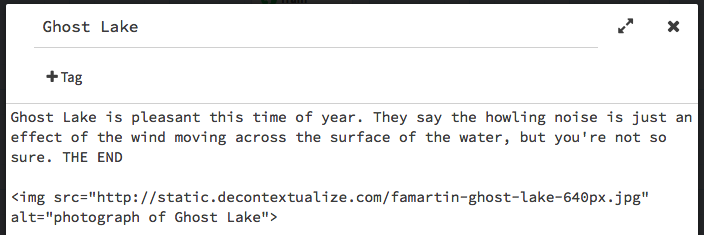
Passage name: Ghost Lake
Passage body:

    Ghost Lake is pleasant this time of year. They say the howling
    noise is just an effect of the wind moving across the surface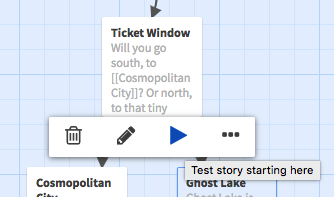
of the water, but you're not so sure. THE ENDYou can delete a passage using the “Trash” icon that appears when you select the passage. Twine will ask for confirmation. After you delete the passage, the story editing view will show a big red X wherever it finds links to the passage that you just deleted:
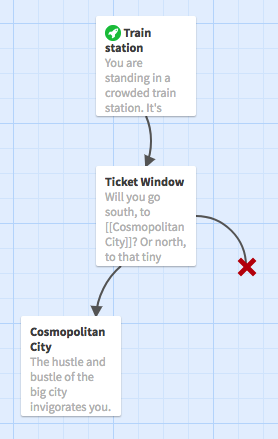
When you see this, you should go back and fix the link! (You can either remove the link from the text of the passage, or add a new passage with the name that the link targets.)
You’ve now made a simple branching story in Twine. If you want to try
it out, use the ▶️ Play button in the panel at the bottom
of the Twine window. This will open a new window that shows your story!
It’ll look something like this:
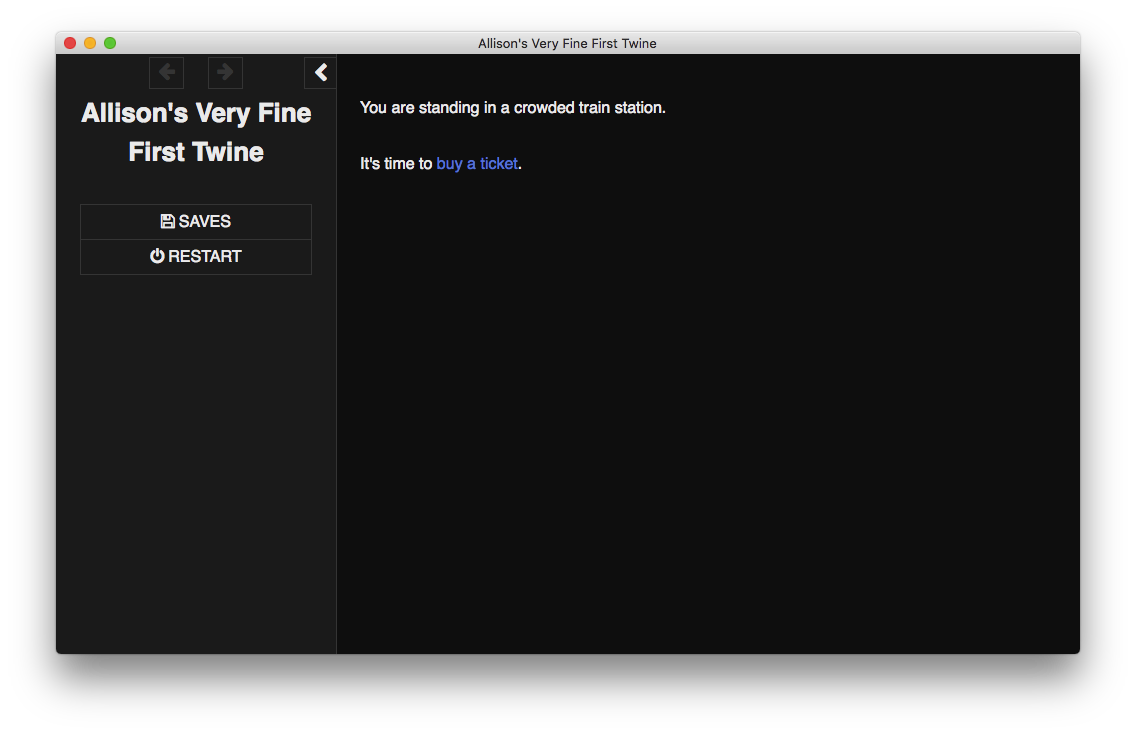
You can follow links through your story and then close the window
when you’re finished. The Test button does the same thing
as Play, except that it also shows story format-specific
“debugging” information (i.e., annotations and messages that might make
it easier to fix problems when they come up). See SugarCube’s
Test Mode Guide for more information.
You can also start the game in test mode from an arbitrary passage by
selecting the passage in the story edit view and using the
▶️ button that appears. This is helpful when you want to
test just a small part of your game and not the whole thing.
Twine automatically saves your work as you go. If you want to share
your game with other people, you need to publish it to a file. Do this
either by returning to the story list and using the gear icon, or by
clicking on the story’s name in the story editing interface and
selecting Publish to file. This will create an HTML file
with your story in the location you select.
You can send this file to your friends, or upload it to the Internet using any service that allows you to upload HTML files (also known as “static content hosting”). If you don’t have somewhere on the web to upload your file, try:
I uploaded a completed version of the game we’ve been working on so far to my personal web hosting.
Unfortunately, Twine 2 doesn’t currently support the ability to bundle media (like images, video and sound) with your story file. But underneath the hood, Twine is just a fancy way of creating HTML files, so you can use HTML tags to easily link to media hosted on your own website.
For example, I’ve taken a
Creative Commons-licensed image from Wikimedia Commons and uploaded
it to my own personal web hosting site. (Thanks,
Wikimedia user Famartin!). Now I can include the URL of the file in
an <img> tag right inside the passage text. (Make
sure to add an alt attribute for people who can’t load the
image or who are using a screen reader.)
Passage name: Ghost Lake
Passage body:
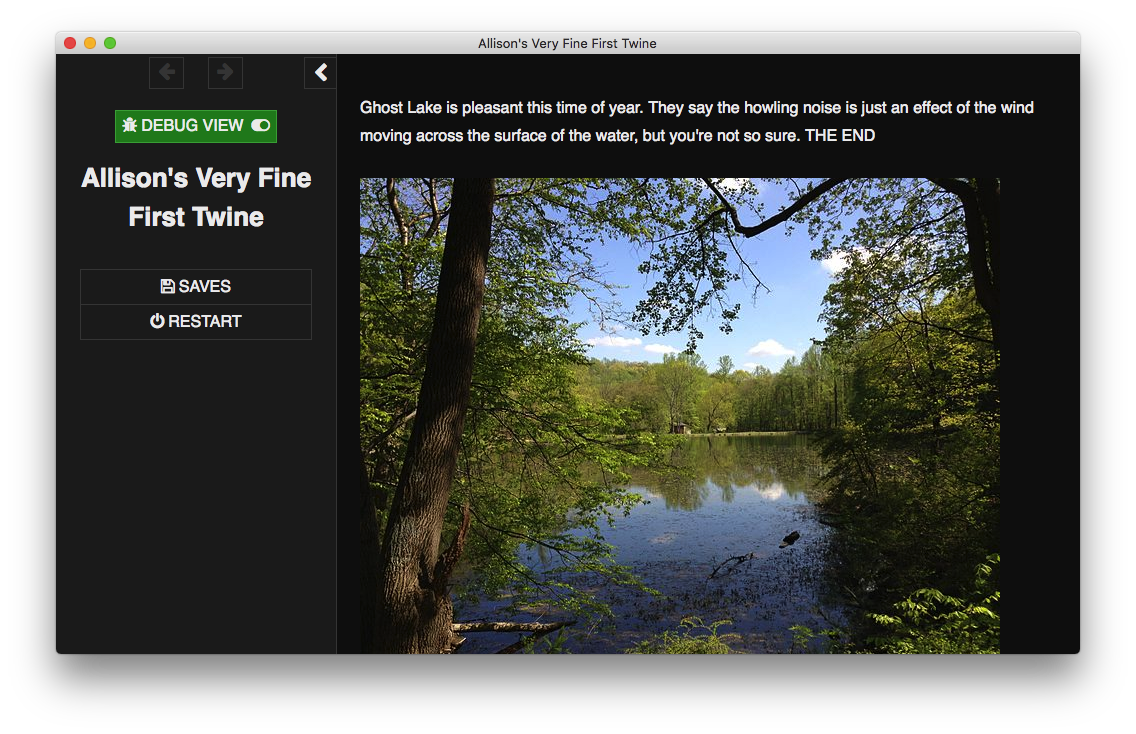
Ghost Lake is pleasant this time of year. They say the
howling noise is just an effect of the wind moving across
the surface of the water, but you're not so sure. THE END
<img src="http://static.decontextualize.com/famartin-ghost-lake-640px.jpg" alt="photograph of Ghost Lake">Now when you play the game, you’ll see the image in the spot where
you put the <img> tag:
You can also simply place your media in the same folder as the HTML
file that Twine generates, and refer to those files using a relative
address in your Twine code (e.g.,
<img src="my_image.png">).
You can use similar strategies for embedding audio and video. The official documentation has good instructions on how to do so.
A recent (2020) GitHub issue on adding assets to Twine 2 games links to many different solutions to the problem, including encoding your media assets as Base64.
In this section, I’m going to talk about all the ways that your Twine game can be responsive to the choices of your reader, including “remembering” information from one passage to the next, and making the shape of your text contingent on what choices the reader has made.
We’re going to talk about macros, variables, and functions.
A “macro” is a bit of pre-defined code that you get for free with Twine. Among other things, macros allow you to keep extra information in your game behind the scenes, and then change the way your story is displayed based on that information.
Macros are written like so:
<<something>>… i.e., two angle brackets surrounding something, where
something is the name of the macro you want to use. Some
macros have other information between the brackets, as we’ll see below.
Note that macros are not HTML tags! They only work in Twine,
not in any old web page. If you want to peruse all of the macros
available to you, the official
SugarCube documentation is a good place to look.
The first macro we’ll talk about is
<<textbox>>, which allows you to prompt your
reader to type in something. You can then take whatever they typed in
and use it in another passage. Start a new Twine game from scratch, and
edit the starting “Untitled Passage” so it looks like this. (Note: I
won’t be including screenshots for the passage editing box for the
remainder of this tutorial.)
Passage name: Welcome!
Passage body:

    Please enter your name below.

    <<textbox "$player_name" "Your name" "Greetings">>
This looks complicated, so let’s break it down. The word
textbox indicates to Twine that we want to use the
textbox macro, which causes a text input box to appear on
the screen. The textbox macro needs a little bit more
information to do its job, though. In particular, it needs at least
three parameters, or extra bits of information, which you
supply by following the name of the macro with three different strings
of characters inside of double quotes.
What are those strings, exactly? Well, first off, the reader’s going
to input some text, and we want to use that text later. We need to give
that text some kind of handle, or name, so we can refer to it later. The
name by which a value is known in Twine is called a “variable name.” In
this case, $player_name is the variable name. (We could
have chosen whatever name we wanted—it just has to start with a
$ and only contain letters, numbers and underscores.)
Secondly, the text box needs to have “default” text, i.e., text that
appears in the box before the user has interacted with it. This is the
second parameter, in our case the text Your name.
Finally, the third parameter allows you to specify which passage the reader should go to after submitting the information in the text box. In this case, I specified a passage called “Greetings,” which I hadn’t made yet (though once you’ve closed the passage editing window, you’ll notice that Twine has automatically made it for us.)
Here’s the text of the macro again:
<<textbox "$player_name" "Your name" "Greetings">>Altogether, you can read this macro as saying: “Hey, Twine! Make a
text input box. Whatever the reader types in, remember it in a variable
named $player_name. Put the text Your name
inside the text box at first, and when the reader submits their entry,
take them to the passage called Greetings.”
Note that there’s no reason that you should have known off the top of your head what any of these parameters mean, or what order they should be specified in. For that information, you just have to find the part of the SugarCube documentation about this particular macro. A big part of the process of learning how to use SugarCube is learning what all of the macros are and what the order of the parameters is.
Of course, just putting what the player typed into a variable isn’t
going to do much. We need to actually do something with that
variable. SugarCube has a number of macros for manipulating variables
and changing what the game does based on the value of a variable. The
simplest of these is <<print>>, which you use
like so:
<<print $variable_name>>… replacing $variable_name with the name of the variable
you’d like to display. I’m going to edit the “Greetings” passage in the
game I’m making so that it displays whatever the reader typed in the
first passage. Edit the “Greetings” passage like so:
Passage name: Greetings
Passage body:

    Hello, <<print $player_name>>!
In the example above, we told the the
<<textbox>> macro to use the variable name
$player_name, which is why we put $player_name
in the <<print>> macro. Play the game from the
beginning, and you’ll notice that whatever you type in the first passage
shows up in the second!
EXERCISE: Make a Twine game that asks the reader multiple questions about themselves, one after another. (E.g., “what’s your name”, “what’s your hair color”, “think of a number from one to fifteen”, etc.) In the final passage, display all of the information that the reader typed in.
Because displaying the value of a variable is so common, SugarCube
has a shortcut. You can just put the name of the variable (including the
$). For example, the following passage text will do exactly
the same thing as the passage text above:
Passage name: Greetings
Passage body:

Hello, $player_name!The <<textbox>> macro is just one of many
ways to get variables into our games. Sometimes we want to make our own
variables and set their values to something of our own imagining, not
that of the reader. We can do this with the
<<set>> macro. The syntax of the
<<set>> macro looks like this:
<<set $variable_name to value>>… where $variable_name (again) is a name that we choose
for the variable, and value is some kind of value, usually
either a number (like 5) or a string of text (like
"Mother said there'd be days like these"). (More about
different kinds of values below.)
Including this macro in a passage will set the variable to the given
value whenever the reader visits that passage. To demonstrate, I made a
Twine game with four passages. The text of the passages is included
below. Make sure that the game starts with the “Quiz start” passage.
(You can control this using the Start Story Here option in
the extended menu after selecting a passage in the Story Edit
window.)
Passage #1:
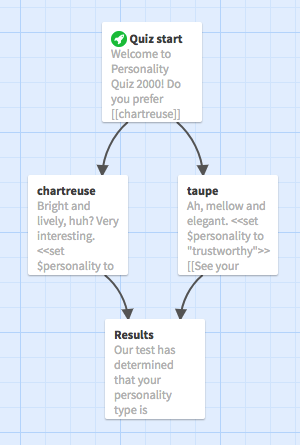
Passage name: Quiz start
Passage body:

    Welcome to Personality Quiz 2000!

    Do you prefer [[chartreuse]] or [[taupe]]?
Passage #2:
Passage name: chartreuse
Passage body:

    Bright and lively, huh? Very interesting.

    <<set $personality to "flirtatious">>

    [[See your results|Results]]
Passage #3:
Passage name: taupe
Passage body:

    Ah, mellow and elegant.

    <<set $personality to "trustworthy">>

    [[See your results|Results]]
Passage #4:
Passage name: Results
Passage body:

    Our test has determined that your personality type
    is $personality. Thanks for participating!
Here’s what the story should end up looking like in the editor:
Play the completed version of this personality quiz to see how it works and find out what your personality is like!
The <<set>> macro allows you to set
variables to different kinds of values.
In the above example, the value we set for $personality to
a kind of value called a string. Strings contain “strings” of
characters, and are what you want to use for any textual information you
want to store. When you make a string value, you have to surround the
value in double quotes "like this".
The <<set>> macro can also set
numerical values, like 5 or 19.42.
When you’re writing a number, you don’t have to include quotes.
The difference between these two kinds of values (strings and numbers) will become more apparent later on, when we talk about expressions. For now, just file away the idea that they’re two different things.
EXERCISE: Create a Twine game that
<<set>>s a$scorevariable for a reader, based on which of several passages they choose in the game. Have all passages lead to a “Game Over” passage that displays the$scorevariable.
You can change a variable to a new value once you’ve set the value
initially. You can use this capability to track the reader’s progress
through your story over time. To change the value of a variable, simply
use the <<set>> macro again. In one passage,
you might set the variable at first like so:
<<set $favorite_color to "red">>… and then in another passage:
<<set $favorite_color to "blue">>The variable $favorite_color will now be
"blue" until the end of the story (or until your story
changes its value again!). Here’s an example game that changes a
variable that tracks the reader’s hunger level in response to the
choices that they make.
It’s common to want to change a variable’s value based on what the value currently is. Say, for example, you’re keeping track of a player’s score. You might want to increase (or decrease) the user’s score by some amount, without having to set the value to some exact number.
There’s an easy way to do this with SugarCube using
expressions. An “expression” is some combination of values,
variables and operators that the computer examines and
evaluates, producing a single value. We’ll talk more about
expressions below (what they are, how they work, and the rules for
putting them together). But for now, here’s how to write an expression
that makes the <<set>> macro increase a
variable by one.
Say you start in one passage with this code:
<<set $score to 0>>If you want to increase the value in $score by 1, you
might put this macro in another passage:
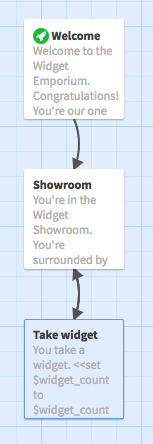
<<set $score to $score + 1>>Let’s make a quick game that takes advantage of this. In the game, you’re invited to take as many widgets as you’d like, forever. Make a new Twine story and create the following three passages:
Passage #1:
Passage name: Welcome
Passage body:

    Welcome to the Widget Emporium.

    Congratulations! You're our one millionth customer. You've
    won an unlimited supply of widgets! How exciting.

    <<set $widget_count to 0>>

    [[Enter the showroom|Showroom]]
Passage #2:
Passage name: Showroom
Passage body:

    You're in the Widget Showroom. You're surrounded by
    beautiful, sparkling widgets.

    You have $widget_count widget(s).

    [[Take widget]]
Passage #3:
Passage name: Take widget
Passage body:

    You take a widget.

    <<set $widget_count to $widget_count + 1>>

    [[Back|Showroom]]
Your game should look like this:
I uploaded the complete version of the widget game for you to play.
You can replace + in the expression with -
if you want the value to decrease by one instead of increasing.
You can also change the number: if you put 20 instead of
1, the value will increase by twenty instead of one. Give
it a try!
We’ve spent a lot of time here creating passages that serve one
purpose only: to use the <<set>> macro to set a
variable to a particular value, then continue to some other passage. It
turns out that this is a very common thing to want to do—so common, in
fact, that Twine has a short-cut that allows you to set a variable right
inside a link! This technique is called a “setter link” and it looks
like this:
[[Text of link|PassageName][$variable = value]]… where Text of link is the text that the link should
display, PassageName is the passage the link should go to,
$variable is the name of the variable you want to set, and
value is the value you want to set the variable to.
Using setter links, we can make a version of the Personality Quiz Twine to just two passages.
Passage #1:
Passage name: Quiz Start
Passage body:

    Welcome to Personality Quiz 2000!

    Do you prefer [[chartreuse|Results][$personality = "flirtatious"]]
    or [[taupe|Results][$personality = "trustworthy"]]?
Passage #2:
Passage name: Results
Passage body:

    Our test has determined that your personality type is
    $personality. Thanks for participating!
EXERCISE: Using setter links, can you make a version of the Widget Emporium game that uses only two passages? Only one passage?
<<if>>At this point, we know how to set variables, print variables, and how to change the value of a variable after it’s been set. Now we’re going to learn how to make our Twine stories do different things based on the value of a variable.
The
<<if>>/<<else>>/<<endif>>
macro checks to see if the value in a variable meets certain criteria.
If it does, then the text between the <<if>>
and <<else>> gets displayed, and any macros in
there will be executed. If it does not, then the text between
<<else>> and
<<endif>>, again along with any macros. (If you
don’t need special behavior for when the <<if>>
condition fails, you can just leave out
<<else>>).
The simplest way to use
<<if>>/<<else>>/<<endif>>
is with a variable name after the if. The following code
would display “You’ve got the key!” only if the variable
$player_has_key has been set to a value with the
<<set>> macro previously.
<<if $player_has_key>>You've got the key!<<else>>That key should
be around here somewhere...<<endif>>
Here’s a Twine game that makes use of
<<if>>/<<endif>> macro to show a
stretch of text in a passage only if the player has visited another
passage.
Passage #1:
Passage name: Start
Passage body:

    You are in a forest clearing.

    <<if $wearing_spectacles>>
    Because you are wearing the crystal spectacles, you see a [[cat]]
    here, its whiskers silvered by the moonlight.
    <<else>>
    It occurs to you to rummage through your [[belongings]].
    <<endif>>
Passage #2:
Passage name: belongings
Passage body:

    In your belongings, you find a pair of crystal spectacles. You
    decide to put them on.

    <<set $wearing_spectacles to 1>>

    [[Back|Start]]
Passage #3:
Passage name: cat
Passage body:

    The cat speaks. "I am the Cat of Time," he says. "I can take
    you to any time you wish."

    BEST ENDING 100% COMPLETION
Here’s what the completed layout should look like:
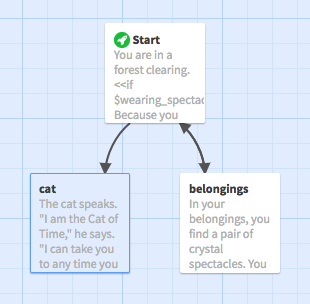
Here you can see that the belongings passage
<<set>>s the $wearing_spectacles
variable to 1 when the reader visits the passage. When the
player returns to Start, the previously hidden stretch of
text (linking to the cat) appears, allowing the reader to
complete the story.
Play Cat of Time here.
You can also use <<elseif>> to chain checks
for multiple conditions; see the example for either()
below.
SugarCube has still another way for you to introduce interesting behavior into your stories: functions. A “function” is a little piece of code, defined by SugarCube behind the scenes, that you can use in your Twine code as if it were a value or an expression. We’ll talk about a few of these below, or you can read the full list of SugarCube functions in the official documentation.
The either() function takes a series of comma-separated
values inside its parentheses. When you play your story, Twine will
randomly choose one of these values. You can use this to add a bit of
color to your games:
Rain is falling from the <<print either("slate", "stone", "somber")>>
sky.
… or to make something random happen:
<<set $player_fate to either("death", "happiness", "fondue")>>
<<if $player_fate is "death">>
    You die, finally and painfully.
<<elseif $player_fate is "happiness">>
    You live happily ever after.
<<elseif $player_fate is "fondue">>
    You have a fondue party with all of your closest friends.
<<endif>>The visited() function can tell you how many times the
reader has visited a particular passage in the game. Just put the name
of the passage that you want to check inside the parentheses (and inside
quotation marks):
You have visited the cheese shop <<print visited("Cheeseshop")>> time(s).You can also use this function in <<if>>
macros to make decisions based on whether the reader has visited a
particular passage:
<<if visited("University") > 0>>
    You've been to the university, so you know everything you need to know
    about interactive text.
<<endif>>The previous() function evaluates to the name of the
last passage the reader visited. You could use this to check to see
which passage the reader just came from, if a passage has more than one
entry point:
You are successful in your career, even though <<if previous() is
"University">>you start with no real-world experience<<else if previous() is
"Training">>you have no formal education<<endif>>.Read the SugarCube documentation on expressions.
The operator is checks to ensure that the value to the
left of the operator is the same as the value to the right. But there
are a number of other operators that we can use as well! Learning how to
use these operators will open up new possibilities for interesting rules
and procedures in your stories. Here’s a list:
is: true if the left value is equal to the right
value.neq: true if the left value is NOT equal to the right
value (neq is short for not equal).>: true if the left value is greater than the right
value.<: true if the left value is less than the right
value.>=: true if the left value is greater than or equal
to the right value.<=: true if the left value is less than or equal to
the right value.So, for example, to check whether a variable
$player_name has some value other than Josephine,
you might put the following macro in your code:
<<if $player_name neq "Josephine">>
    This madeleine is only for Josephine! Go away!
<<endif>>
You can also combine expressions using the operators
and and or. The and operator
takes two expressions, one on its left, and the other on its right, and
counts as “true” if both expressions are true. The or
operator similarly takes two expressions, and counts as “true” if either
the left-hand expression is true, or the right-hand expression is true
(or both). The expressions on either side of and and
or should be surrounded by parentheses.
So, for example, to make some text appear only if the reader has five coins AND that their name is “Robert”:
<<if ($player_name is "Robert") and ($coin_count >= 5)>>
    You are Robert, and you have enough coins to purchase this magnificent
    and magical sword.
<<endif>>
To make some text appear if the player has either 0 points or 100 points:
<<if ($score is 0) or ($score is 100)>>
    You are either really good at this game or really bad at this game.
<<endif>>
Finally, the operator not takes an expression directly
to the right, and counts as “true” if the expression is “false,” and
“false” if the expression is “true.” You can use this to check to see if
a certain condition does not obtain:
<<if not ($score is 0)>>
    You have more or fewer than zero points! Good job.
<<endif>>You may have noticed that every time we use a macro, some weird extra
space appears in the rendered output. This happens because Twine counts
the new lines that are inside the macro (i.e., after the
>>) even if the macro doesn’t display anything (e.g.,
if an <<if>> condition isn’t true). For
example, the following code:
Here's some text before.

<<if $player_name is "Sandra">>
You are Sandra.
<<endif>>

And here's some text after.
…displays with extra empty lines. These empty lines correspond to the line breaks after the macro tags, which SugarCube by default does not ignore. This is pretty annoying from an aesthetic perspective. Thankfully, there are ways to fix it.
One way to fix this is simply by removing as many new lines as
possible, nestling the <<if>> macro up against
the other text:
Here's some text before.<<if $player_name is "Sandra">>

You are Sandra.<<endif>>

And here's some text after.
This is fine (try it out!) but it’s a little bit confusing, because
the <<if>> macro is in a strange place.
Ideally, we’d like to be able to retain the whitespace in our code, as a
means of keeping things clear, while still avoiding the appearance of
unwanted whitespace.
Another way to do this is with the \ character
(backslash). If you put this character at the end of a line, it
instructs Twine to not display a new line in the rendered output:
Here's some text before.

<<if $player_name is "Sandra">>\
You are Sandra.

<<endif>>\
And here's some text after.
If you have a number of macros that you want to include in your code
without introducing unwanted whitespace, you can use the
<<nobr>> tag. The
<<nobr>> macro, which instructs Twine to ignore
new lines up until it encounters <<endnobr>>.
For example, to include a number of <<set>>
macros without making a huge amount of whitespace:
<<nobr>>
<<set $cheese to 1>>
<<set $room_title to "Vestibule">>
<<set $current_trouser_type to "Denim">>
<<endnobr>>The “Links within lexia” section of Stacey Mason and Mark Bernstein’s “On Links: Exercises in Style” describes several link styles that Sugarcube implements. Let’s look at a few of them!
This list is not exhaustive! I’m just writing about some of the low-hanging fruit. Using Sugarcube’s interactive macros, links macros, and DOM macros, it’s possible to create links with very sophisticated and expressive behaviors with very little coding.
The <<cycle>> macro creates a “cycling”
link. This kind of link does not lead to another passage; instead, when
the reader clicks on it, the text of the link changes. This macro is
functionally similar to a dropdown widget, or a series of radiobuttons,
and Sugarcube stores whatever option is currently displayed on the
screen. Schematically, the macro looks like this:
<<cycle "$var_to_store_result" autoselect>>
  <<option "Label1" "value1">>
  <<option "Label2" "value2">>
  ...
<</cycle>>
Sugarcube will store the currently selected option in the variable
named between quotes in the first parameter of the
<<cycle>> macro. Each step of the cycle is
included as an <<option>> macro within
<<cycle>>; the first parameter of
<<option>> is the text of the link to show, and
the second parameter is the value to store in the variable named
above.
Here’s an example:
For brunch, I ate <<cycle "$brunch" autoselect>>
  <<option "huevos rancheros" "eggs">>
  <<option "waffles" "waffles">>
  <<option "Cobb salad" "salad">>
<</cycle>>
In this example, the value of the selected option ends up in
$brunch, which you can then use in a subsequent
passage:
Later in the day, I remembered the $brunch fondly.What it looks like:
When clicked, the replacement link replaces itself with the given text. It’s pretty simple from a syntactic standpoint:
<<linkreplace "original link text">>replacement<</linkreplace>>In the following code, I’ve shown how you can create nested replacement links in order to create a recursively expanding text:
There's no place like <<linkreplace "home">>my <<linkreplace
"brother">>brother-in-law's college roommate<</linkreplace>>'s
apartment<</linkreplace>>.
What it looks like:

Sugarcube’s <<timed>> macro lets you add
text to the page as time advances after the passage is first displayed.
The syntax looks like this:
<<timed 100ms>>Text to display...<</timed>>The second parameter needs to be formatted as a CSS
time data type (that is: an integer plus either
s for seconds or ms for milliseconds, with no
space between).
Subsequent stretches of text to reveal can be included inside the
<<timed>> macro using
<<next>>, which you write before each stretch
of text you want to be revealed. The <<next>>
macro also has a parameter for a CSS time data type.
Here’s an example that brings it all together:
It's not like that at all, it's like... \
<<timed 1500ms>>different. \
<<next 2000ms>>Like something else entirely. \
<<next 2500ms>>You wouldn't even know what it's like.
<</timed>>
The passage is the basic unit of text in Twine. A passage has a title, some tags, and a body. In addition to displaying and linking passages, Sugarcube gives you the ability to treat passages as data and as raw material. This section has a few examples of things you need to know to take advantage of this.
Sugarcube looks through your game for passages with particular names, and then uses those passages for particular purposes. There’s a full list of special passage names in the official documentation. But here are a few highlights:
StoryInit: The contents of this passage are evaluated
before the story begins. This is a great place to put variable
initializations.StoryAuthor and StoryDisplayTitle: The
contents of these passages are used to set the story’s author and its
display title in the left-hand Sugarcube UI bar.PassageHeader and PassageFooter: The
contents of these passages are included before and after (respectively)
the current passage is displayed. You can use this to include common
elements in every passage, or to do pre-passage variable initialization
and cleanup.You can include the body of a passage in another passage using the <<include>>
macro. Any macros or code inside the included passage will be
evaluated in the context of the current page. This is very powerful! It
allows you to write small snippets of code and text that you can reuse
in other circumstances.
The <<include>> macro syntax looks like
this:
<<include "Passage name" "div">>The first parameter of the macro is the name of the passage you want to include; the second parameter is the name of an HTML tag to wrap the output of the passage in. (This is important for adding CSS styles to included passages!)
You may have noticed the spot in the passage editor where you can
enter “tags.” This feature lets you easily put your passages into
different categories, and then you can use that categorization in order
to apply particular behaviors to a subset of your passages. This is
especially useful when you’re writing code that will potentially run in
the context of many different passages, like passages that you
<<include>> into many other passages.
The tags() function evaluates to a list of tags for the
current passage; tags().includes("tag-name") checks to see
if a tag with tag-name is applied to the current passage.
You can use an <<if>> statement with this
expression to perform some action only if the passage has a particular
tag. For example, if you wanted to display a status bar, but only on
passages that have a particular tag, you might put the following in the
PassageFooter passage:
<<if tags().includes("show-stats")>>
Widgets: $widgets
Mood: $mood
<<endif>>The Story.lookup() function (part of Sugarcube’s Story
API) allows you to get a JavaScript array of passages matching a
particular tag. Passages
are represented as JavaScript objects; you can get a passage’s title
using its .title property. Putting all of this together,
you can build a bit of code that creates a link to a random passage like
so:
<<set $passages to Story.lookup("tags", "destination")>>
<<set $picked to either($passages)>>
[[Jump to random|$picked.title]]
In this case, it’s picking only passages with the tag
destination. The link, when clicked, takes the reader to a
randomly selected passage with this tag. Neat!